Tuesday, January 31, 2012

Recipe: Chicken Piccata

I've kind of been slacking in the kitchen for the past few days, so I thought I would make it up to my husband with a satisfying meal. I've always loved Chicken Piccata, but have never actually made it myself. I searched through cookbooks and online recipes, and eventually ended up combining a few and adding my own twist. I kept it simple, and let me tell you - it was delicious! Comforting, with bright and lively flavors. I served ours on a bed of arugula, which I think pairs nicely with the tartness of the lemon and saltiness of the capers. Enjoy!


 Ingredients

2 skinless and boneless chicken breasts butterflied, cut in half and pounded out until fairly thin
Salt and freshly ground black pepper to taste
Enough flour for dredging
8 tablespoons unsalted butter 
5 tablespoons extra-virgin olive oil 
3/4 cup fresh lemon juice  - Lemon zest from one lemon
1/2 cup (or a bit more if needed) chicken stock 
1/4 cup brined capers (rinsed)
1/3 cup fresh parsley (chopped)

Instructions: 

It is important to start with very thin chicken breast. To accomplish this, it helps to both butterfly the chicken and pound it out (I usually put mine on a cutting board, stretch plastic wrap to fully cover the chicken and use a rolling pin to pound it a couple of times to become thinner). Season chicken with salt and pepper. Dredge (coat both sides of) chicken in flour and shake of excess. In a large skillet over medium high heat, melt 3 tablespoons of butter with 5 tablespoons olive oil. When butter and oil start to lightly sizzle (careful not to get the oil to the point of smoking), add chicken and cook for 3 minutes. When chicken is bowne, flip and cook other side for 3 minutes. Remove and transfer to plate.
 
Add the lemon juice, chicken stock, remaining olive oil and capers (remember to rinse them first!) directly to the pan that the chicken was cooked in (do not wash out or rinse pan in between). This will allow you to deglaze the pan, scraping up bits from the pan for extra flavor. Also, the flour left in the pan from the chicken helps to thicken the sauce. Add the remaining butter. Season with salt and pepper to taste. Bring to a boil, whisking regularly - careful not to burn. Pour sauce over chicken and garnish with parsley.

Best of Instagram Week 1

I meant to post this on Sunday, but things have been a little crazy around these parts. Jenni, of Story of My Life, hosts a weekly link up where readers can share their Instagram pics from the past week. I've enjoyed using Instagram to share photos and to take quick shots when my camera is not always handy. A few of my faves from this week are below.


From left to right: 1.) My 35mm Minolta film camera 2.) Our pup, Penelope 3.) One of my fave (non alcoholic) beverages, San Pellegrino Aranciata 4.) In the process of making valentines 5.) Finished valentine 6.) My husband and niece watching TV together 7.) Putting one of my aqua mason jars to use as a make up brush holder 8.) Our Crosley record player 9.) Early Valentines gift for Jake, Adele's 19 which has our wedding song 10.) Milk glass and aqua Fenton glass from my "adopted" grandma and my great grandma 11.) The cup of coffee that took me three tries to make 12.) A stress relieving combo of coconut bubble bath, Sauvignon Blanc, and Hunger Games on my Kindle.

Friday, January 27, 2012

Seize the Weekend Vol. 3

Seize the Weekend is a weekly feature on NoPlaceLykeHome. I have scoured the internet looking for 5 crafts/recipes/projects that are easy to tackle in a weekend. My hope is inspire you (and myself) to roll up our sleeves and get creative.

1.) Make art out of your favorite quote or sentimental song lyrics using an old painting. I found this from one of the most great-idea-filled blogs, A Beautiful Mess. For a tutorial on how to make your own, click here.


2.) Bake special cupcakes for someone you love (or for me). I think these coconut ones look especially enticing. Recipe via Martha Stewart found here.


3.) Get organized. Sorry to be a buzz kill, but your entire weekend can't be filled with glittered manicures and banana pancakes. Use these 10 tips from professional organizers to get your space under control. Originally posted on apartmenttherapy.com.


4.) Make this delicious looking spicy lemon chicken wrap for lunch. Originally found on Pinterest via thelondoner.me, recipe located here.


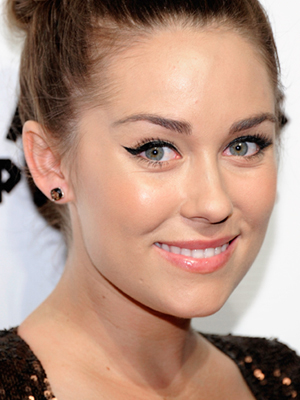
 5.) Step outside of your makeup comfort zone. Don a classic cat eye for date night or an evening out with friends. Our old friend, Lauren Conrad, shows you how - in a video found here.

   via

If you try anything listed above this weekend email me a photo at brhea.koneman@gmail.com. I hope that your weekend is simply fabulous!

Tuesday, January 24, 2012

DSLR Photography: Understanding Shutter Speed

The next segment of DLSR photography that we will cover is shutter speed. If you missed it, click here to learn more about exposure and aperture.


Shutter speed is literally as it sounds, the length of time that the camera's shutter is open. Think of the shutter as a curtain inside of the camera in front of the sensor that opens and closes. The amount of time that the shutter is open determines how much light is let into the camera and how much movement can be captured in a photograph.

When you set the shutter speed, you determine how long the shutter will be open and how much light can make it to the camera's sensor. A fast shutter speed (think of the curtain opening and closing quickly) will only let in a small amount of light. A slow shutter speed (think of the curtain staying open for a longer amount of time) will allow plenty of light into the camera.

Your camera will record any movement within the frame for the entire length of time that the shutter is open. If you use a fast shutter speed you can stop action (this is useful for sport's photography or any action shots that you want to freeze in time). Conversely, a slow shutter speed will capture all movement within your frame (see image of metro train below).

Shutter speed is measured in seconds and fractions of seconds. One would think that a fraction of a second is fairly fast, but you would be surprised at how much movement can be captured with a shutter speed of 1/30.

The image below illustrates where the camera's shutter speed is displayed. You can also see what the shutter speed is through the camera's viewfinder by pushing the shutter button half way down. The larger the denominator (bottom number) of the fraction, the faster the shutter speed is.


To change your camera's shutter speed, simply put your camera in manual mode and turn your camera's front dial (pictured below). 


Keep in mind, it becomes difficult to get a crisp shot when hand holding a camera and using a slow shutter speed. In many cases, using a slow shutter speed requires the use of a tripod. If you don't have a tripod with you, leaning against or propping your camera on something stable can help to reduce camera shake. 

A good tip to reduce camera shake, is to have the denominator of your shutter speed meet or exceed the number of your focal length. For example, if you are using an 18-55mm lens and are zoomed in to 55mm, your shutter speed should be at least 1/60 if hand holding your camera. Similarly, if you are using a 100mm lens/ focal length, you should try to keep your shutter speed at or above 1/125.

The picture below is one that I took in D.C. using a slow shutter speed in order to capture the movement of the incoming train. The man in this photo was standing still. If he would have, for instance, raised his hand to itch his head - the movement of his arm would be captured in this photo due to the fairly long shutter speed used.


As we discussed in last week's post about aperture, there is a semi-manual mode for shutter speed as well, called shutter priority mode. Shutter priority mode is TV on Canon and S on Nikon. Shutter priority mode allows you to set your shutter speed and ISO and the camera will compensate by setting the aperture automatically, to get a properly exposed image.

If you have time this week, try working with a moving subject (i.e. people, an animal, vehicles, running water etc.). Change up your shutter speed and take some time to look at what impact this has on your photographs.

Please feel free to leave a comment with any questions that you have or anything that you would like for me to cover in a future post.

Monday, January 23, 2012

Home Tour: Master Bed & Bath

I've been meaning to put up some photos of our home for a while now. Truth is, we rarely have everything clean long enough for me to want to take/share pictures. 

We have come a long way with our house since moving in almost 2 years ago (I cannot believe it has been that long!) and still have a lot that we would like to do. I figured that sharing some photos would be a great way to catalog where we started, where we currently are and where we would like to end up with our house.

(Note: The before shots were taken with my old cell phone - but you get the idea. Some things that are difficult to tell from the photos: the master bedroom wall color is a beige/taupe and the trey ceiling in the bedroom is a pale blue. The dresser and armoire are a dark wood, not black.)


I think that we both enjoy the size and layout of our master bed and bath. Eventually, we would like to put some time and money into updating features such as flooring (hardwood in the bedroom and tile in the bath), fixtures (new counters/sinks in the bathroom and tile in the shower). These are kind of in the "5 year plan". But, there are some things that I would like to add within the next year, including:

A tufted upholstered headboard like this one:

 A rolled arm bench to go along the gallery photo wall like this one:


I want to paint the bathroom cabinets (might be a future DIY) a light grey or cream. Like this, via one of my favorite blogs, TenJune:


So, what do you think? Do you have any ideas for us? I am totally open for suggestions!

Ice Cream Sundae Sunday

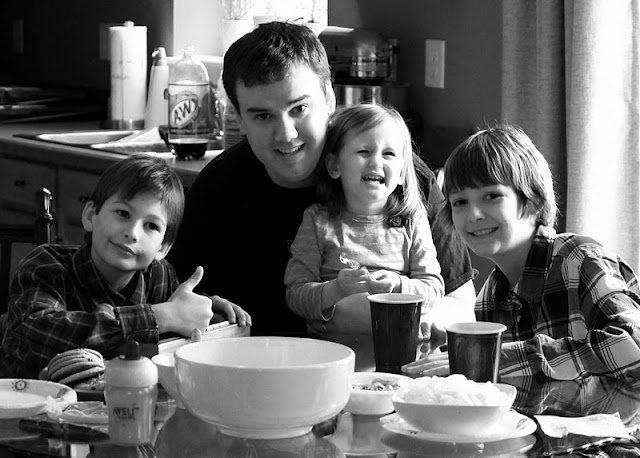
Yesterday, Jake and I had my parents, our niece (Addie) and my cousins (Chase and Cade) over for a visit. We made some good old fashioned ice cream sundaes with all of the toppings. 

Addie was particularly goofy, as she usually is when she has an audience. For the most part, she referred to Chase and Cade as, "COUSINS!" and not by their separate names. They let it slide.

It was a lot of fun to have our house full of kids. The picture of my mom trying to put whipped cream in Addie's mouth gets me every time.


I hope that you all had a great weekend!

Friday, January 20, 2012

Seize the Weekend Vol.2

Since last week's "Seize the Weekend" was so much fun to create, I am making it a weekly series. I have scoured the internet to find five diy projects/recipes/crafts that are easy to tackle in a weekend. Check 'em out below!

1.) Make storage pockets from gallery wrapped canvases. I have some old canvases in our garage that I might use to make mail storage for our mudroom. I found this project on craftzine.com. For a step-by-step tutorial click here.


2.) Cook a warm and comforting soup. Even though it is going to be in the 60s here this weekend, I'm hoping that this minestrone soup will make me feel like I am seeking refuge indoors from the elements. This soup is from Better Homes & Gardens. You can find the recipe here.


3.) Create handmade Valentines. Martha (we are on a first name basis) has a wonderful list of ideas here on how to make your own.


4.) Let's keep this fancy schmancy manicure trend going. I found this ombre inspired idea on Pinterest via makeupalley.com.


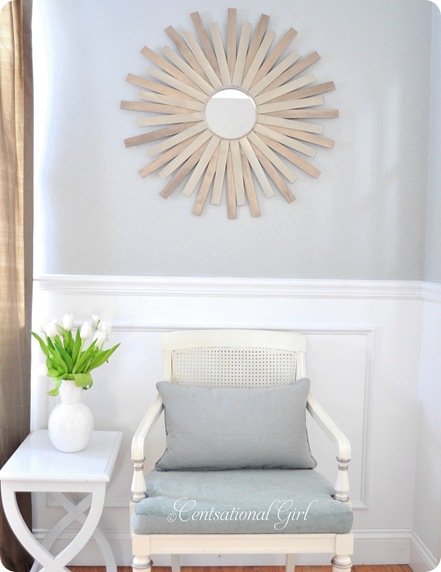
5.) Create a sunburst mirror using paint stirrers. This beauty comes from one of my absolute favorite blogs, Centsational Girl. For a tutorial on how to create your own mirror, click here.


If you take on any of these projects please email me a picture (brhea.koneman@gmail.com) I'd love to see what you make. I hope that you all have a lovely and creative weekend!

P.S. I'm linking up with one of my favorite blogs today, E Tells Tales :)

Wednesday, January 18, 2012

Our Love Story Chapter III

The next chapter of our love story begins when Jake and I entered college. If you missed them, please check out Chapter I and Chapter II.

After saying goodbye to Jake at the airport in Charlotte, I had a few days to mentally prepare myself for starting school in Columbia, SC. I headed to the University of South Carolina both excited and terrified. I was eager to make new friends (which had always come fairly easy to me) and to have a fresh start. I would miss Jake, but I had a feeling that I was going to love college.

My first few days were a blur. I met a lot of new people and did my best to make friends, but I soon found that I did not fit in. The large group of friends from high school that I once took for granted, was very hard to come by in college. I felt like an outsider and very uncomfortable in my own skin. Not to mention, I missed Jake terribly. Eventually, I made a small group of girlfriends that I was able to open up to and be my (weird) self with. 

I was very shaken and doubted myself a lot during my freshman year. I was on the phone with Jake almost every single night. Usually, about once every 3-4 months we were able to visit one another. I will never forget how I felt when I first went to stay with Jake in Cortland, NY. The excitement that I had was beyond anything that I'd ever experienced.

During our Freshman year of college, Jake's parents made the decision to move from Upstate New York to Wisconsin, where they were originally from and where all of their extended family lives. I think that this made being away from me harder on Jake, because he no longer had the comfort of his family being close by. Jake decided to transfer to the University of Wisconsin at Milwaukee for his sophomore year. This made our distance door-to-door about 1,000 miles.

I visited Jake in Milwaukee in the fall of our sophomore year, and we talked more about moving closer together. We wanted to make a smart decision and did not want to jump into something that we might regret. I decided to get serious about transferring to a school in the Midwest. It was certainly a risk, but one that I was willing to take.

I have the most supportive parents in the world, and though they were saddened by the idea of me living so far away, they wanted to see me happy. I also think that they felt that Jake was the real deal. Ultimately, I decided to look at schools in Chicago. My dad took me to visit the city and I fell in love. I liked the idea of Jake and I still having separate lives, and time to be independent, but to be close enough to see each other when we wanted to.

I was accepted into a few different schools in the Midwest, and eventually made the decision to transfer to Loyola Chicago in the spring semester of my sophomore year. This would put Jake and I about 1.5- 2hrs away depending on traffic. To some people, this would still be considered long distance, but the thought of being able to hop in the car to see each other on the weekends was unimaginable to us. I had a tough transition at first, but overall, I loved my time in Chicago. I lived in a house with six other women (yes, it was as crazy as it sounds) and we learned a lot from each other.

Jake and I spent almost every weekend together and grew closer than ever. We both faced some difficult circumstances during our time in the midwest. My father was diagnosed with prostate cancer and Jake and I both lost close family members. This motivated me to try to live life to its fullest and to go for an opportunity that I may have normally passed up. I decided to study abroad in Rome, Italy during the first semester of my senior year.

Jake and I were apart for 4.5 months and spent a lot of time on Skype. My poor father paid for some seriously expensive international cell phone bills. I traveled throughout Europe and learned a great deal about myself while living abroad. When I returned from Italy, Jake and I agreed that we never wanted to live apart for a long period of time again.

Right before I left for Europe, my sister found out that her and my brother-in-law were pregnant. Our niece, Adelaide, was born a few weeks before my college graduation. Holding Addie for the first time made me certain that I would be moving back to Charlotte after graduation.

I had hoped that Jake would move to North Carolina with me, as I think we both felt confident that we wanted to spend our lives together. However, there were a lot of details to work out and it would take a serious leap of faith on Jake's part.


Tuesday, January 17, 2012

DSLR Photography: Understanding Aperture

I have been getting quite a few emails and comments asking about my photographs (thank you!). A lot of you want to to know what type of camera I use and would like for me to share some photography tutorials. I have added additional lenses to my arsenal since I posted about my camera, but you can find out some of what I use here. I appreciate all of your feedback. I am still fairly new to photography myself, but would be happy to share some of the things that I have learned with you.

I use a Canon - therefore, the tutorials posted here will mostly be geared towards Canon users.

The goal of these tutorials will be to get you to move out of auto mode, and to gain some creative control over your images by using manual and semi-manual modes.

Photography literally translates to, "To draw with light". Learning how to work with light is critical to create a successful photograph. There are three main camera settings that control light and must be balanced in order to get a properly exposed photograph; ISO, aperture and shutter speed. Today we will discuss aperture.


Exposure is indicated by the exposure meter in the middle of your LCD screen (circled in red below) or along the bottom when you look through the camera's viewfinder and hold the shutter button half way down.


Notice that the exposure indicated above is in line with the zero (the small rectangle below the 0). This tells us that the photo about to be taken will be properly exposed. As you head into the +1/+2 range your photograph could turn out too bright and will be considered overexposed. As you head into the -1/-2 range your photo could be too dark and considered underexposed. In some situations you may want to over or under expose an image, but for the sake of a beginner lesson, do your best to line up with the zero. By learning the exposure triangle and all of it's components, you will be able to get a perfectly exposed image.

Today, we will focus on learning aperture.

Aperture (f-stop): Aperture is the size of the opening in a lens that allows light to pass through it and into the camera. By controlling your aperture, you can determine how much light reaches the camera's sensor. Think of an aperture as a circle that can open wide or close to a small size. When opened wide, the aperture can let in a lot of light. When tightened to be small, the aperture lets in very little light. The size limit of the aperture is determined by which lens is being used.

Another important feature of aperture is that it controls the depth of field. Depth of field is how much of your image is in focus. Many people new to the DSLR world are especially enamored with the ability to blur a background, but to keep a specific point in focus. This is controlled by the size of the aperture (as well as the focal length and distance from your subject - which I will cover in a future post). To get a shallow depth of field (blurred background) the aperture opening will need to be large and opened wide (small f-stop number). To get a large depth of field (i.e. for a landscape where you would want everything to be in focus) the aperture opening would need to be rather small (large f-stop number).

To set the aperture, you will select an f-stop number. One of the more confusing aspects of aperture is that the smaller the f-stop number, the larger the actual opening of the aperture is and vice versa (the larger the f-stop number is, the smaller the actual opening of the aperture is).

You may need to check your camera's manual to find out how to change the aperture on your model - but, I will show you how it works on my camera model.

To change your aperture, put your camera into manual mode (m on the mode dial). Hold down the Av button (located to the right of  your LCD screen) while turning the front dial (located directly above your shutter button). You should see the number preceded by an F change when you do this. You can view this through your viewfinder or on your LCD screen.


Review: While in manual mode (M) hold down Av button  and turn the front dial. You should see the number proceeded by an F change.

DSLR cameras also offer semi-manual modes, which I think are a great way for beginners to learn how to control their cameras. A semi-manual mode that allows you to have control over aperture is the aperture priority mode or Av (A on Nikon) on your mode dial.


The aperture priority mode allows you to select your aperture and ISO while the camera compensates by setting the shutter speed for you, to get a properly exposed image. When in aperture priority mode, the front dial will now change your aperture, and you will no longer need to hold down the Av button.

Before this post gets out of control long (I may have already crossed that line), there is one more thing that I would like to share with you. Be aware that the lens that you choose determines how large your aperture can be. This is indicated in the name of your lens. For example, many beginners may use an 18-55mm f 3.5- f 4.6 lens. What this means is that when you are zoomed all the way out (18mm) your maximum aperture size is 3.5 and when you are zoomed all the way in (55mm) your maximum aperture size is 4.6.

When I first got my camera, I found that the kit lens that came with my camera did not allow me to get the background blur that I wanted to achieve in my photos. If I can recommend one thing for every beginner to purchase, it would be this lens (Nikon has a version as well). It is one of the least expensive lenses out there and allows you to open your aperture all the way to 1.8. You can't find a faster lens for the price! Also, it is the perfect lens to learn on and to be creative with without breaking the bank.

Our next lesson will be about shutter speed. In the meantime, practice using aperture. Take photos of the same subject at different f-stops and get a feel for what it does to your photos.

I hope that you found this tutorial helpful. Please feel free to comment or email me at brhea.koneman@gmail.com with any questions that you have. Now, get snapping!

Back to Top